

After two days of cutting wires, stringing beads and creating loops, I have finally made our wedding cord. Grabe lang, ang sakit pala nito sa kamay. But after seeing the finished product, it was all worth it. :)
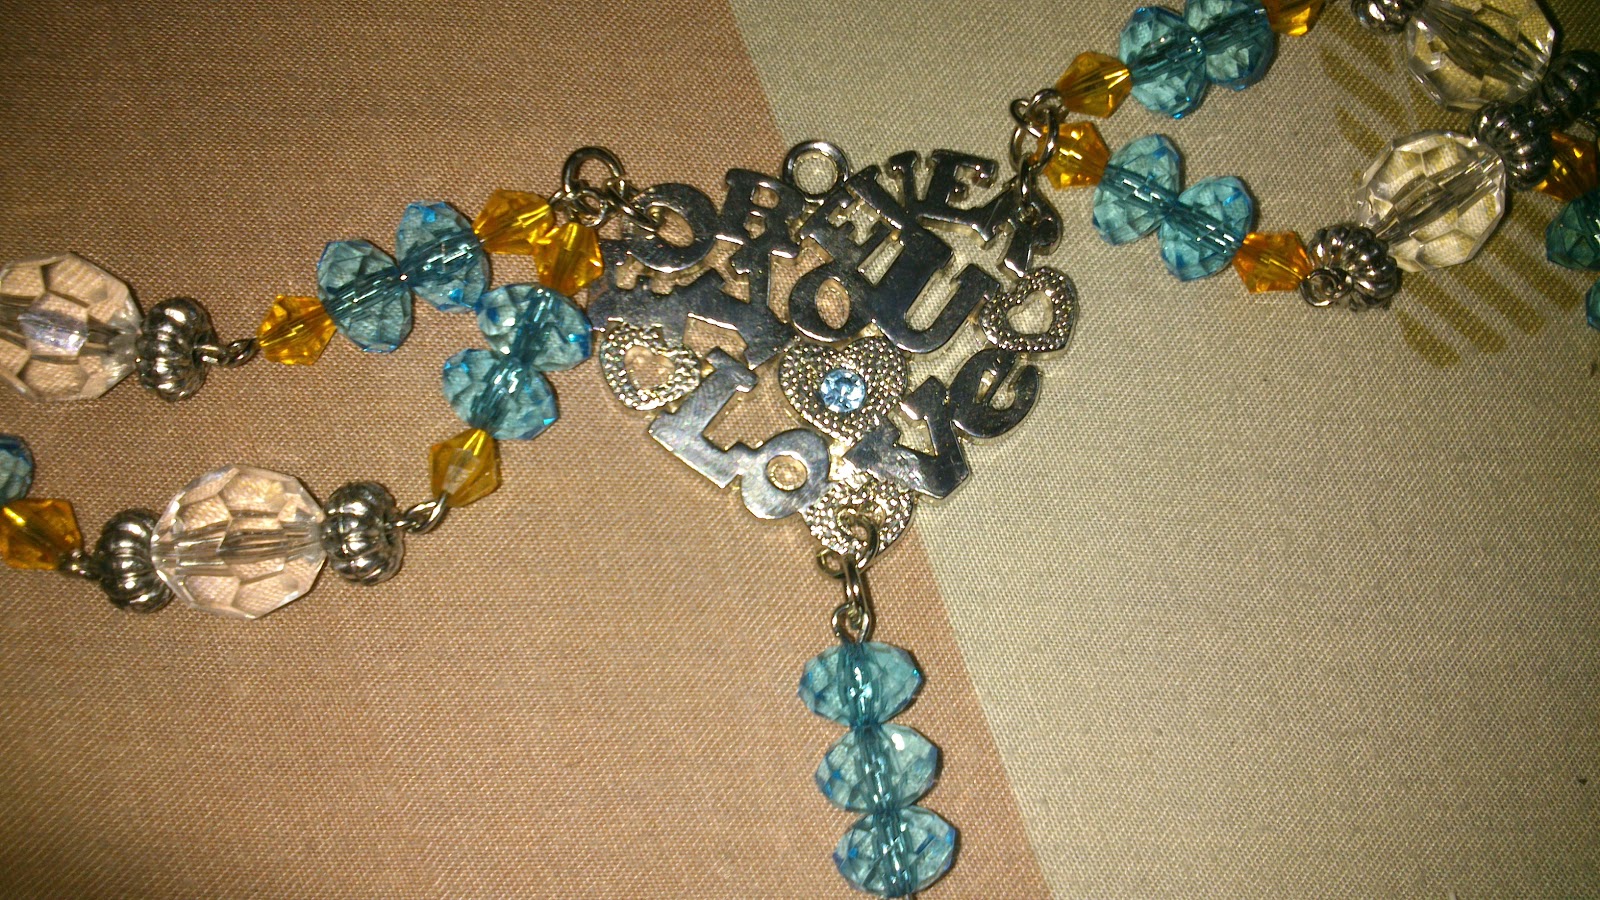
For our cord, I used turquoise, orange and white acrylic beads, all in different shapes and sizes. I also bought silver spacers (if that is the correct term) to add more texture to the cord. And of course, let's not forget the eyepins and the jumprings to connect all the beads.
Just a tip, if you're going to go to Wellmanson to buy all your materials, make sure to visualize your cord's design so that you would have an idea what materials to used and what beads to buy. I was so overwhelmed by the choices in Wellmanson that I just grabbed whatever eyepins and beads that I could find. Then when I had finally decided on a pattern, I found out that the eyepins that I got were too short for my chosen design. I had to go back to Wellmanson's to buy longer eyepins. Pfft. Sobrang hassle.
Anyway, here is the result of my hard work and creativity. Pwede na pala akong maging DIY queen. (Feelingeran lang noh? Haha.)


I didn't want to use the usual medallion that would connect the loops so I decided to look for a cute little brooch as an alternative. However, I couldn't find the right brooch that could hold all strings together. There was actually one heart brooch, but I thought it was too bulky and a bit expensive at P50 a piece. So I just bought a pair of his-and-hers keychains and decided to use one of them as a connector. The keychain was actually the perfect choice because it has holes where I could put the jumprings used to connect the loops. Plus, the crystal on its center matches our motif perfectly. Oh diba, meant to be.
To see the step-by-step process in making this cord, just visit Tine's blog. She gives much clearer instructions than I do, so you wouldn't have a hard time making your own cord. Take it from me, I just followed the tutorial that she did to make mine. Hehe. :)

For our cord, I used turquoise, orange and white acrylic beads, all in different shapes and sizes. I also bought silver spacers (if that is the correct term) to add more texture to the cord. And of course, let's not forget the eyepins and the jumprings to connect all the beads.
Just a tip, if you're going to go to Wellmanson to buy all your materials, make sure to visualize your cord's design so that you would have an idea what materials to used and what beads to buy. I was so overwhelmed by the choices in Wellmanson that I just grabbed whatever eyepins and beads that I could find. Then when I had finally decided on a pattern, I found out that the eyepins that I got were too short for my chosen design. I had to go back to Wellmanson's to buy longer eyepins. Pfft. Sobrang hassle.
Anyway, here is the result of my hard work and creativity. Pwede na pala akong maging DIY queen. (Feelingeran lang noh? Haha.)


I didn't want to use the usual medallion that would connect the loops so I decided to look for a cute little brooch as an alternative. However, I couldn't find the right brooch that could hold all strings together. There was actually one heart brooch, but I thought it was too bulky and a bit expensive at P50 a piece. So I just bought a pair of his-and-hers keychains and decided to use one of them as a connector. The keychain was actually the perfect choice because it has holes where I could put the jumprings used to connect the loops. Plus, the crystal on its center matches our motif perfectly. Oh diba, meant to be.
 |
Naks! May referral pa sa blog ko. Thanks Nat! I'm so happy that I was able to help you through my DIY experiment. :)
ReplyDeleteOf course! :) Thank you rin sa napaka-detailed mong instructions kaya nadalian ako sa paggawa ng cord. :)
DeleteHi Nat, I'm a fan of your blog! Nov bride ako, 2013. :) Nainspire ako gumawa din ng sarili ko. Salamat and keep on writing! Inaabangan ko.
ReplyDeletehttp://brattybonch.wordpress.com
Thanks Alina! :) Natouch naman ako. :) I'll also follow your blog, mahilig kasi akong magbasa-basa ng tungkol sa wedding preps eh. :)
Delete